Showing posts with label of. Show all posts

Sunday, 26 April 2015

Order of War Challenge


ORDER OF WAR: CHALLENGE is a multiplayer stand-alone game in the world of ORDER OF WAR™, published by Wargaming.net, packing even more intense World War II real-time strategy action. With 6 extended modes, 12 unique maps, and hundreds of units under player control ORDER OF WAR: CHALLENGE gives players a battlefield experience of epic scale. With a focus on fast-action gameplay, and featuring exclusive bonus content, ORDER OF WAR: CHALLENGE is the ultimate way to experience online RTS gaming. With a new advanced gameplay system and including fog of war, ORDER OF WAR: CHALLENGE redefines combat mechanics and gives players a tense battlefield experience with plenty of room for wide-ranging tactics.
12 Unique Multiplayer Maps - Each map features different types of cross-country terrain and urban areas to provide great replayability.
6 Extended Multiplayer Modes With these new modes you have the opportunity to prove you are the best commander on the online battlefield in a variety of ways.
Command troops of the USA, Germany or the Soviet Union - Grasp your units by knowing their strengths, weaknesses and discover how to exercise their power to defeat your enemies.
4 Co-op Survival Missions - Play shoulder to shoulder with your comrades-in-arms to defend your headquarters from enemy attacks of increasing intensity. To get extra income and new reinforcement types, capture control points that appear randomly throughout the map but only stay for a short time.

suggested system requirements:
Pentium 4 3.0 GHz, 2 GB RAM, graphic card 256 MB (GeForce 7600 or better), 10 GB HDD, Windows XP/Vista/7.
Read more »

East India Company Battle of Trafalgar


Re-enact the greatest sea battle in history in East India Company: Battle of Trafalgar
NEW YORK – November 24rd, 2009 - Paradox Interactive is excited to announce East India Company: Battle of Trafalgar, a stand-alone add-on to their naval war strategy game East India Company, exclusively available for digital download at all major digital download portals from December 8th.

A complement to the original East India Company, East India Company: Battle of Trafalgar recreates the legendary naval battle fought between the British Royal navy and the combined fleets of the French and Spanish navies during the height of the Napoleonic wars in late 1805. Featuring historically accurate ships from all three fleets along with the key naval personnel of the battle, East India Company: Battle of Trafalgar is a simulation of what in reality was the most decisive British naval victory of the war as, led by Admiral Lord Nelson aboard HMS Victory, an outnumbered British fleet sank 22 enemy vessels off of the South West coast of Spain without a single ship of their own being lost.

East India Company: Battle of Trafalgar Features:
A re-enactment of the Battle of Trafalgar from both the British and Franco-Spanish perspective
Historically accurate ships from all three navies
Five real-life naval commanders from the era, including Admiral Lord Nelson, French Admiral Pierre Villeneuve and Spanish Admiral Federico Gravina
Take control of naval battle groups comprising of the greatest warships of the Napoleonic era
Real-world naval strategy of the era accurately recreated in the battle

system requirements:
Core 2 Duo 2 GHz, 2 GB RAM, graphic card 512 MB (GeForce 7800 or better), 6 GB HDD, Windows XP/Vista/7.
Read more »

Tuesday, 7 April 2015

Top 10 most influential people of all time in world history

Top 10 most influential people of all time in world history

Top 10 most influential people are the one who influenced people with their religions, beliefs, their customs, preachings, etc and made a fruitful attempt in making the world to get inspired by them, Today on Alltop9, we are posting who are the top 10 most influential people of all time in the world history and the list goes as like this:

1. Jesus Christ


Its been more than 2000 years and we, people of Earth still worship lord Jesus, we call him son of God, he created peace among people with his speech and messages, most part of the people are under christianity which is the  worlds largest religion in the world, as per 2012, out of 7 billion people in the world, 2.3 billion people belongs to christianity(approx) and still more people are joining christianity! we, humans believe in religion since back from history and we still believe in religion, which had greater effect in the way we are living now, our customs, our way of treating others etc all are based on religion and Jesus preached many good things which influenced many lives!

2. Muhammad


Islam is the second worlds largest religion followed by people all over the world, as per 2011, around 1.57 billion people are islamic,Muhammad is the second most influential person in world history, who is a messenger (prophet) of God (Allah),  Muhammad was not only a religious preacher, prophet, but also a military commander, a brave warrior, a philosopher and he wrote the most reading book in the world "Quran", he brought equality, love and made arabian people to follow same religion Islam

3. Mahatma Gandhi


Mohandas Karamchand Gandhi, the father of nation in India (Bapu) was one of the eminent freedom fighter and a leader in India, with just nonviolence he defeated the Britishers and made them to leave India, India is the second most populated country in the world next to china, and Gandhiji with just his words made everyone in India to follow him, and walk with him for the fight against the British people in nonviolence way, he influenced many people, his photo is even in the currency of India, and his birthday is celebrated as "International Day of Nonviolence"

4 Gautama .Buddha


Siddhartha famously known as Gautama Buddha is the founder of Buddhism, we all know his story, he was born rich to a king, who made Buddha to be the happiest child, and never made Siddhartha to experience any sad or any depression, but after his marriage, he went to look at the people in the kingdom and the feeling was never experienced by Siddhartha, He left everything even his pregnant wife, and went to forest and became Buddha, he is one of the true god lived in Earth, he preached about Buddhism, the only religion which showed to treat all the people equally whether they belong to any religion and live the life peacefully without harming anyone

5.Albert Einstein


Albert Einstein, one of the greatest minds of all time, he became famous for his Theory of Relativity and Mass-Energy relation which is considered to be the worlds most famous equation. His theories, postulates provoked many scientists which made them to develop and invent many things, he is still one of the inspiration for not only to the students but also to the young scientists

6.Paul the Apostle


Paul the Apostle is one the primary disciple (12 followers) of Jesus christ, who taught the gospel of christ to the whole world in 1st century, he is considered to be the most influential and important person during his times. he founded many churches (for the promotion of christianity) in Asia, Europe etc, his writings influenced Martin Luther kings "Doctrine of Sola fide"

7.Sir Isaac Newton


Sir Isaac Newton, one of the greatest inventor  who was a physicist, mathematician, a natural philosopher who is known to be the one of the most influential scientists of all time, his famous works on Newton Mechanics, Universal Gravitation, Calculus, Optics etc made him so popular as he did greatest inventions at the earliest age of physics, no one would ever be known that Earth is a big magnet and it has a gravitational field, his 3 laws are very popular which are basic for very every device now we are using

8. Martin Luther King Jr.


Martin Luther King Jr, was famous for his nonviolent way of fighting for the civil right, he was the leader of African-American Civil Rights movement and he was an activist and humanitarian, he fight for the racism and slavery and gained so many followers for his new way of nonviolence fight as like Gandhiji, he even got the nobel prize for Peace, All his speeches were entirely based on his beliefs on Christianity

9.Abraham


Abraham was one of the prominent person who has given highest position of respect in religions like Judaism, christianity and Islam, this made him to be well known in every religion and thus made him to be one of the influential person in the history

10. Martin Luther


Martin Luther was a monk, priest and a professor of theology in late 16tg century, his notable works like
"The 95 Theses", Luthers large Catechism. Luthers Small Catechism", "On the freedom of a Christian" etc influenced many people from his period

Source of the article: based on the comments and reviews in thetoptens.com
images: Wikipedia
Read more »

Monday, 6 April 2015

Adventure of the Week Sam Max Episode 103 The Mole The Mob and the Meatball 2007

This week, we return to a series thats just beyond the five-year release threshold I try to maintain, with Telltale Games Sam & Max Episode 103 -- The Mole, The Mob and the Meatball.  This 2007 animated point-and-click adventure game was the third episode in Telltales first series based on the comic books of Steve Purcell, popularized within the genre by the classic 1993 Lucasarts graphic adventure Sam & Max Hit the Road.  The sardonic canine detective Sam and his hyperactive, joyfully violent rabbit buddy Max have starred in three successful series at Telltale at this writing.


This episode picks up where Episode 102 left off, as our heroes set out to investigate the bizarre hypnotic teddy bear sent to control a talk show host at WARP-TV.  We can see that the writing and design were still finding their stride in these early efforts, and some of the resource reuse that made episodic gaming a good economic fit for adventure games is still a bit obvious.  But its a solid adventure game design, with some very funny moments and puzzles.

As always, I encourage interested gamers to tackle Sam & Max Episode 103 independently before proceeding here, especially because the game is still commercially available (and frequently on sale at very attractive prices.)  While Telltales own published walkthroughs make me less concerned about spoiling the puzzles than is usually the case, good fun is to be had experiencing the games plotting and dialogue firsthand.  With that said, be forewarned that there are likely to be...

***** SPOILERS AHEAD! *****

The story opens, per usual in the first two seasons, with a call from the commissioner -- amid the morbidly witty dialogue, we learn  that a mole sent in to investigate the Toy Mafia has not been heard from in quite a while.  Sam and Max are asked to go in after him, starting their investigation at Ted E. Bears Mafia-Free Playland and Casino, a name which doth protest too much.  The opening credits feature a purple background this time; the episodes cycle through a rainbow of colors as the season progresses.

To find the mole, our heroes are equipped with the secret code phrase: "Does the carpet match the drapes?"  Sam informs Max that if we have located the mole, "Hell say, Well, I never! and smack me across the face."  This does eventually come into play plotwise, but serves mostly as an excuse for us to ask this question of everyone we meet, earning innocent and wholesome responses despite the setup.


Sam & Maxs office is much as it was in previous episodes.  The TV is showing Midtown Cowboys reruns from the last episode, and theres still quite a bit of dialogue reuse here; economic constraints are still showing a bit.  Our resident rat "friend" Jimmy Two-Teeth is operating a fencing joint out of his usual rathole in the wall below the bulletin board, and the closet now contains the charred Hypno-Bear from Episode 102, which may indeed be a clue about the Toy Mafias doings in this episode.  Theres nothing useful plotwise in the office at the moment, so were off to explore the street and see whats changed since the last episode.

Convenience store proprietor Bosco is in a Frenchman disguise this time, donning a beret for the sake of entertaining yet another paranoid fantasy.  This time hes afraid of the Toy Mafia, and believes they saw through his Englishman disguise last time, though his accent and mangling of the language are even less convincing en Francais.  He fears unauthorized deliveries to his store, and has created an improved security system to prevent such nefarious product placement -- it consists of an image recognition camera and a vacuum system that places unrecognized merchandise out on the street.  He has a listening device for sale -- for ten million dollars, following his usual pattern of outrageous pricing for something that will likely turn out to be mundane.  Theres a Secret of Monkey Island reference here -- we can ask Bosco if he has random items in stock, including a rubber chicken with a pulley in the middle.  Theres also a funny series of "Do you..." -- "NON!" gags based entirely on comedic timing, something not possible in the pre-talkie adventure era.  At the snack counter, theres a promotion going on the NotChos -- a free toilet brush with every purchase, but Bosco hastens to inform our heroes that its a USED toilet brush.  Its been fun, but we havent acquired any inventory items here either.


So next were off to see what line of work Sybil is in these days.  Someone has installed a webcam on top of one of the cactuses in her office.  Hmmmm.  Now shes a professional trial witness, though she doesnt have her first case yet; she swears this, her latest career, is the one that shes sticking with.  We hear some more recycled gags here, as Sybils decor hasnt been updated much since Episode 102.

Leftys hardware store and Stinkys restaurant are still closed, and the posters at the back of the alley have been updated, though theyre not as funny as some of the offerings in earlier episodes.  Theres a suspicious car parked behind the DeSoto, with a license plate reading "DRGDLR", but it doesnt factor into the plot.

Weve established that not a lot has changed in the neighborhood, so its off to Ted E. Bears Mafia-Free Playland and Casino for some plot progress.  The greeter, Lovey Bear, is a human in a costume bear head and a tailored Italian suit.  He sounds suspiciously Mafioso as he hands out free tokens and accidentally refers to "Don Ted E. Bear" who is doing some "business" in the back -- inquiring informs us only that it is "the kind of business with quote marks around it, sos you know not to ask."


The establishment is brightly lit and colorful but still somehow seedy.  We can use tokens to play Whack Da Ratz! -- we have to shoot 20 of the singing rats to win, without touching the ones that are keepin their mouths shut.  This wasnt super easy to do without a real mouse on my laptop -- I got 19 on my first try, 17 on the second, and 21 on the third, winning a Ted E. Bear refrigerator magnet.

We can hear (with repeated clicks) the entire Ted E. Bear theme song, as performed by the DISTURBING BEAR HEADS mounted on the wall.  Jared Emerson-Thomas did a great job scoring this series, and this bouncy protest song -- by which I mean protested innocence -- is a lot of fun.  Its a shame we dont hear the whole thing in one go until we get to the credits.

Dealer Cuddly Bear hosts a card game.  We can play a game of Indian Poker against one Leonard Steakcharmer, a mustachioed bald-headed circus strongman type (conveniently reused from Telltales "pilot"/test effort, Texas Hold Em.)  The game involves each player drawing a card and putting it on his forehead; we can see Leonards card but not our own, and the highest card wins.  It appears, of course, that Mr. Steakcharmer has some way of discerning his own card -- he looks over Sams shoulder before deciding how much to bet.  Wed like to win his ten million tokens, and hes generous with the terms, as he assumes he cant lose; this seems to be true for the moment.

The guard at the back room door indicates that only Toy Mafia members are allowed in, with a required password; Max asks about joining the Toy Mafia, but the membership contact is also behind the door.  We can guess at the password with unsuccessful but entertaining results, and we see other Toy Mafia bears come and go, whispering the password -- Boscos listening device would probably be handy, and maybe Leonards ten million tokens would be suitable to close the deal.

A one-armed bandit resembles an actual bandit, with mask and striped shirt; its not hard to win, but we dont actually win anything.  Ted E. Bears original meatball sandwich -- circa 1957 -- is on display in a glass case.

Aha!  Here we are -- a very shiny clown nose over the entrance reflects Leonards face, and he can likely see it from across the room.  Can we find some way to obscure the reflection?  This is where we might want to remember that Sam and Max were playing a game at the beginning of the episode that involved throwing playing cards into a wastebasket.  Yep -- the Ace of Spades is still lying on the floor by Jimmy Two-Teeths place.  Returning to the casino and putting it on the clown nose causes Leonard to think hes always got an Ace, and we can easily win his 10 million tokens by exploiting his overconfidence.

Bosco accepts the tokens and gives us his listening device -- its a bug, literally.  That is, its a cockroach with a military background who will repeat precisely what he hears.  Back at the casino, we can listen in and determine the passphrase, which is "Leave the gun. Take the cannolis."
 
Now we can enter the back room and meet Chuckles, the pit boss, whos had his eye on our heroes via the establishments security cameras.  To get into the Toy Mafia, we have to complete two -- wait, three assignments, as Ted E. Bears original meatball sandwich has just been stolen during our conversation.  We need to lean on an uncooperative businessperson, whack a witness in an upcoming criminal case, and "recover a small item that belongs to us."  Further consideration verifies that we have to lean on Bosco by putting toy bears on his sale table; whack Sybil, who the mob has under surveillance; and recover the meatball sandwich, of course.

So how do we sneak product into Boscos Inconvenience Store?  Can we use the Ted E. Bear refrigerator magnet to fool the security system into thinking the bears are expected items?  Doesnt seem like it.  We cant sneak a Bear onto the table directly, but we can distract Bosco by telling him the Toy Mafia is outside.  He spends quite a bit of time looking through his binoculars, speculating about whether the subject of his interest is CIA or else CIA, or Illuminati or The Knights of Malta or Skull and Bones, based on what the person hes observing is reading in the newspaper. This is funny dialogue, and also buys us some time.

Boscos B-TADS 2 security system works as promised if we just try to put a bear on the sale table.  But we can put the Ted E. Bear magnet on the camera, making it contraband and sending it out the door (this didnt work quite the way I expected, but was effective enough!)  Now we can put the purple "I Love You No Matter What" bear on sale, and a Toy Mafia rep stops by to give us the thumbs-up.  Bosco is quite distressed, though the animation isnt quite up to communicating the excellent angst of the voice acting; Telltales engine and technique would improve over time.

So thats one down, but as Sam says, "Our journey to the dark side has just begun."  So lets see if we can track down the meatball sandwich by way of Jimmy Two-Teeth.  Whoops -- that idea panned out a little to well!  We walk in on Leonard, who is waving a gun around and trying to fence the hot sandwich.  Sam tries to be reasonable, but once in a while its good to let the anarchic Max take the lead.  "Hey, is that a cap gun?" he asks, catching Leonard in another cheap cheatin move, and then a little rough-and-ready Max action ends with Leonard tied up.  He swears he wont reveal the sandwichs location, but we know from previous interaction that his late mother means the world to him.  Sam and Max (and the player) team up to deliver some "Yo Mama" jokes - Sams options offer various setups, while Maxs include appropriate punchlines -- making for a fun little dialogue-matching puzzle to break Leonards resolve.  Not all of the lines are jokes per se, some are rather complimentary or at least sentimental, and soon we learn that the sandwich was stashed in the one-armed bandit, and Leonard stole the arm, which we now reclaim.  In short order the arm is restored, a token inserted, and the stolen sandwich is back in the Toy Mafias hands.  Weve left Leonard tied up in the office, of course.

Now were left with the unpleasant task of rubbing out Sybil.  We dont really want to kill her, so well probably have to fake it somehow.  We have Leonards cap gun now, and we noticed the surveillance webcam in Sybils office earlier -- this may be handy, but we cant openly enlist Sybils cooperation in staging her demise.  We can, however, steal her empty coffee cup right off the desk, and return it to her confused gratitude.  She seems distracted and nervous... apparently shes already been told that the Toy Mafia is going to try to kill her before she testifies in a big trial, and of course she would never suspect her dog and bunny friends.  Sam asks, "Have you considered faking your own death?", but shes too honest for that, so we will have to arrange it ourselves.  Maybe we can drug her coffee -- after we get her some coffee -- and use the cap gun, arranging it to look like were shooting her as she passes out?  Sam refuses to obtain any coffee from Boscos -- "We dont ACTUALLY want to kill Sybil." -- but we can fill the cup with ketchup from the condiment dispenser, which may work better for our purposes.  We cant mix in any anti-depressants from the gumball machine outside, either, so lets abandon the drug angle and see what we can do with the cup of ketchup.  We put the cup on her desk, use the cap gun on her, and -- it looks like we missed her, she doesnt fall for it.  But we can use Sams real gun on the ketchup-filled cup, splashing her with red goo and stunning her "dead", just before Max eats the camera and cuts off the feed to the Toy Mafia before she wakes up and gives the ruse away.

Now our boys are in -- but after Ted E. Bear doffs his bear head and reveals himself as the mole, our heroes dont quite realize hes switched sides before he figures out they are freelance police.  A chase ensues (I was beginning to think we were never going to tear carelessly through the streets in the DeSoto in this episode) and the mobsters are driving a vehicle with bulletproof tires. 


We can shoot down a hanging sign to knock them out of commission, and then return to the casino to take down the Don.  Hes out of the office, apparently, but Sam notes that theres always something interesting behind a door marked, "Do Not Enter Under Pain of Death."  Before entering, we can do a little detective work -- theres a map marked with national truck routes, chalkboards with Smuggling, Racketeering and Extortion accounting, and a mini-bar in the office.

Behind the door, we discover an assembly line making Hypno-Bears, and Harry Moleman is (in his debut appearance, looking much larger than we know him to be later on) running the show.  He tries but fails to hypnotize Sam and Max -- Sam is still protected by the hypno-shield in his hat and Maxs brain is -- well -- but they opt to play along.  The mole orders Sam to shoot Max, but fortunately we have the cap gun.  Max goes through a lengthy death soliloquy that manages to reference the Dukes of Hazzard, Sting, and Charlies Angels among other pop-culture references, and then puts himself through the machines vacuum system before popping out at the other end.  He gets stuck momentarily, pointing out that the system has a pressure gauge, so maybe we can jam it and blow the whole thing up somehow.

We can see teddy bear voice gizmos in a bin, being assembled, but we cant take one.  We can grab a finished bear from the line, however -- "Give all your money to Ted E. Bear", it intones.  This isnt a very useful command to give to the Mole, but this seems like a good idea to play with.  We can use the bug to listen to and record Harry, but would have to get him to say something more useful -- hes just reading the newspaper comic strips, and his opinions about Mary Worth and Garfield arent going to help us.  But the One-Armed Bandit is also in the room for maintenance -- someone noticed that it actually coughed up a prize when we reclaimed the meatball sandwich -- and his "Youre on fire!" gizmo might be of use.  We drop it in the bin, a semi-rejected bear drops off the line, and we convince Don Ted E. Bear thats hes aflame.  This sends him running for the (fake, OSHA-violating) fire extinguisher on the wall, we pull the vacuum lever, and Harry Moleman is sucked into the machinery a few minutes before he clogs the pressure system and the factory blows up.

Sam and Max run for their lives, dodge the debris and head off for a well-deserved celebratory dinner, as Chuckles the bear removes his head to reveal himself as a secret government agent.  With the factory destroyed, its apparently time for Plan B... which we will learn more about in episode 104.


I really like this series -- Telltale Games success with this game did much to revive the adventure genre on a commercial basis, and the Sam & Max series consistently balances sharp humor and entertaining puzzle design.  These arent difficult games in the brain-busting manner of the old days, but there are still plenty of fun red herrings and rewarding "Aha!" moments.  Good stuff, and well get to Episode 104 at some point.
Read more »

Of Import Mine Sweeper 1992

During the 8-bit and 16-bit console era, most of the software development was done in Japan.  But occasionally a Western computer game would appeal enough to Eastern sensibilities for a port to be developed.  Most of these ports were dungeon-crawl RPGs, but puzzle games were also in the running.  Sometimes this led to odd choices, like the PC Engine port of the game known by most people as the Windows freebie Mine Sweeper.  This is an unusual case in terms of licensing -- Minesweeper and variations on the theme go back to the mainframe days, so a generic variant could have been produced just as easily.  But here it is, and on the PC Engines CD-ROM format, making ARC Co. and Pack-In-Videos version, if nothing else, probably the bulkiest edition ever produced.


The core game plays just like the Windows version with which most readers will be familiar, though without a mouse the interface is clunkier than the ideal.  Each tile contains either a mine, or a number indicating how many mines are detected in the surrounding tiles.  Theres some guesswork involved, and some deductive strategy, making for a simple but compelling one-more-time play experience.  And the CD-Audio soundtrack of this version is rich and varied.


This version justifies its retail existence by adding a couple of extra modes -- theres an Edit Mode allowing players to construct new puzzles, and two additional game modes:


The Voyage moves the game to a more realistic environment, kicking off with a battleship sunk by enemy mines and adopting a different graphical style, replacing modern mines with old-fashioned explosive barrels and markers with skulls.  This mode is broken up into missions, with a password system for retaining progress; failure on any mission means the game is over, but the levels are not randomized so its possible to win with patience and a good memory.


The Cooks Quest mode features some rather bizarre imagery that looks very strange indeed to Western eyes.  It stars a little cook, who appears to be trying to tunnel out of someplace, pursued by a slow-moving boulder.  Instead of safely marking all the mines on the screen, our goal is to find a safe path through the minefield to the exit and the next room, as quickly as possible.

Whats strange is that the cook character resembles 1920s-vintage cartoon caricatures of African-Americans, right down to the "Wah!" sound he makes as the game begins and the boulder encroaches, except hes rendered in chalky whiteface:


And... erm... when a mine is discovered, its portrayed as... a Star of David?!?  Perhaps this mode is meant as some kind of metaphor about flour and unleavened bread, but I hesitate to speculate further.   Japanese games of this era often featured insensitive racial and religious imagery, but usually the choices made sense from a certain perspective.  This one leaves me speechless.


Thats all there really is to say about Mine Sweeper.  Its a competent version of a classic game, with some questionable visual choices that would certainly have been controversial if it had made it to North American shores.  Fortunately, I think NEC realized that TurboGrafx-16 owners were not about to spend significant money on a game included free with Windows 3.1, and in this case were probably better off for it.


If you really must pay good money for a game whose most popular versions were free, you might be able to find a copy of this console port here.
Read more »

Swords of the Damned hard copy now available!

Woo-hoo! "Swords of the Damned," the first-ever novel based on Adventures Dark and Deep™ novel is now available in hard copy! Heres the cover blurb:
Morcar, a professional adventurer down on his luck, is shanghaied into attempting his riskiest mission yet – venturing into the labyrinthine tunnels underneath the ancient city of Graybarrow. Accompanied by a band of desperate renegades and rogues, he faces both the dangers of the unknown depths and a force that lies beyond death itself, with cultists and warriors on his trail. Can he conquer the Swords of the Damned, or is he destined to join their ranks...
You can get the softcover book from DriveThruFiction.com here, and dont forget that the ebook format is of course still available directly from the author via Amazon.com (sorry, theres no way to buy them both at the same time due to licensing).

Its really a nice book, and if youre a fan of Adventures Dark and Deep or fantasy fiction in general, you should definitely check it out.
Read more »

Adventure of the Week The Crimson Crown 1985

This week, Im finally getting around to a classic Ive never played before -- 1985s The Crimson Crown, a Penguin Software / Polarware illustrated adventure written by Antonio Antiochia, author of the popular Transylvania which I covered way back in 2009.


This was a sequel of sorts, though it was not formally billed as such, and is considered part of the Transylvania series.  Were playing the Apple II version, written in Penguins COMPREHEND language.  The text, unusually for an Apple II adventure, is presented in very readable mixed-case, and the illustrations are important as they often reveal objects and possibilities not mentioned in the text.  The game can be played more quickly with the illustrations out of the way -- theyre drawn using vector-and-fill techniques that take a few seconds to render -- but they really are important.  Fortunately, they can be toggled on and off with the ENTER key.

Interested readers are very much encouraged to attempt recovery of The Crimson Crown first-hand before reading my notes below.  But I will recommend you check out the supplementary material at the CASA Solution Archive --  you may not need the walkthrough, but the transcription of a riddle-bearing parchment from the original packaging is important; it was meant as a form of copy protection and the game cant readily be finished without it.  With that said, Ill leave you to your own decision, reminding you that there are going to be plenty of...

***** SPOILERS AHEAD! *****


We begin on a lake shore, with a sleepy willow tree and a path leading east.  INVENTORY reveals we have nothing, but it also establishes that we have a traveling companion, someone named Erik who says, "We have only what we started with -- ourselves!" 

We can CLIMB TREE to see an owl perched on a branch.  The owl asks, "Who?", and we can SAY various names to no immediate effect.  We cant GET OWL, so well have to come back later when we have a clue about this puzzle.  Trying to CLIMB TREE again establishes the presence of a second traveling companion, as Sabrina says, "We are already in the tree!"  We have to go D to return to the lake shore; our party generally travels along with us, and while we can direct Erik and Sabrina to do things we cant, it seems we travel in lock-step and cant split up the team to solve a puzzle.

Traveling east, we enter the woods; a tree stump lies to the north and there are no other visible exits.  Trying to head north to the stump leads us into a trap, plummeting our party down into a crypt.  Here we see two iron doors and passages leading east and west.  Sabrina is apparently a novice magic user; she has no spell that can get us out of here, despite Eriks urgings that she do something.

Heading west leads us into a large, misty cavern, with no features of apparent note.  East is a cave, where a pulsating crystal ball sits atop a stalagmite.  Trying to EXAMINE BALL is dangerous but necessary to move the plot along, as we are thrust into darkness, where we encounter The Vampire.  He demands that we surrender Sabrina and the boy (Erik?) to him, before we are thrown into a chamber of blinding white light, where a friendlier shape charges us with destroying the vampire "BEFORE HE LEARNS THE SECRETS OF THE CROWN!"  He or she tries to give us something, but we are interrupted by the vampire again, and Sabrina ("the princess") has to drag us out of the room, back to the crypt.  The way east is now blocked by dirt and debris.  Theres considerably more drama afoot here than in Antiochias earlier Transylvania, at some cost to interactivity.

We dont have many options now, so we might as well READ the SIGN near the iron doors and consider pushing the button.  The sign reads:

I am very old, yet Im very new.  Many used me before, now there are few.  A famous knight made me famous, too...  I do not breathe, yet I need air, true.

A powerful, last-resort sword of some kind?  We cant MOVE SIGN; what happens if we PUSH BUTTON?  Hmmm... Nothing happens?  It seems to be a toggle -- pushing it a second time results in a whirring noise, followed by nothing happening on the third push, so it might be an elevator moving between two floors.

What else?  Well, we can go D from the misty cavern onto a staircase, leading to a lower cavern but not all the way to it, leaving a twenty-foot vertical gap to the level below.  We can safely go D, but cant go back U the way we came.  We might as well explore, anyway, as down here there are tall pillars flanking an arched entrance.

Going north may be premature, as it brings us to a gryphons den, though fortunately we can escape by going south again.  South is more cave area, with some mushrooms that are quite dangerous, at least psychically -- trying to GET them induces a warning from Sabrina, too late, and a seizure of sorts that leaves a shriek echoing in our head.  Hmmmm.  I should have EXAMINEd them first -- Sabrina notes that "They are evil and deadly!"

West of this location is a maze, it appears -- a crossroads of twisting paths which meander all directions.  If we hang around for a bit, a spectral sage appears; we can TALK SAGE to get a brief commercial for his or her soothsaying skills before the apparition disappears.

A stump south of the crossroads bears ancient writing, reading "Knock here."  Going S from here plunges us back into the crypt, so this must be the same stump we saw earlier.  Working our way back here, we can KNOCK STUMP -- and a twisting coil of green fire throws all of us backwards -- and back into the crypt, again.

Well, we might as well visit the Gryphon while were making our way back to the crossroads.  We can TALK to him -- "Three riddles have I," he says, and offers us the challenge of answering them to win his treasure.  This puzzle refers to a parchment included in the original game packaging, a copy-protection measure in the pre-Internet era; each stanza apparently corresponds to a riddle, and Ive copied it here from the CASA Solution Archive:

UNTO THINE EYES ALONE

Hands I do not have, yet I grasp so tight.
I love darkness, my enemy is light.
Both the mighty and low know me well,
For in the hearts of men do I dwell!

I wonder as I wander: where am I?
I shed tears, yet I cannot cry,
I trek but cannot walk, swim, or fly,
I am born to die. Say, what am I?

I am, Im not. I visit young and old,
Some I make timid and some I make bold,
Unwise is the one who pokes fun at me.
Beware, for I am a shadow of thee.
My first guesses were GREED, a RIVER, and FEAR.  Only FEAR produces any kind of response, and I suspect that may have been the correct answer to the first riddle, not the last one.  Repeating recognized words causes the gryphon to note that he heard us the first time, so it seems weve got one of the three.  This will take some further thought, so for now well go back to the crossroads.

West of the crossroads is a large, shady tree.  Theres a cat here, "possessed. Its eyes glow with vermilion fire."  The moss-covered tree is too slippery to climb, and the demon cat prevents our passage further west.

Oddly enough, we still dont have anything in inventory!  But weve explored much the accessible map, it seems, and the only major area we havent covered is a forest maze north of the crossroads, "a foreboding intersection of forest paths which lead all directions."  These are always tough to map without droppable inventory, but well have to venture in.  We run into the sage again, who tells us (in verse) that we need a ring, shield, and sword; that we ought to talk with the owl in the tree; and that we should "LEAVE NOT THE SCEPTER, CARRY IT FREE."  Interesting.

As it turns out, this forest area isnt really a maze -- the geography makes consistent sense and the rooms are recognizably unique.  Whew!  Theres a cave to the north, but we cant see in there, due to too many bats, for a bit of a change from the usual darkness puzzle.

In the western part of the forest is a gloomy castle, which we can freely enter.  The interior is fairly large -- we travel north for a while to reach a large candle-lit chamber, with stairs going up and a hall sloping down.  The downward path takes us to the cellar, with a vault door and stairs heading further down.  The vault door is cracked open -- but if we try to ENTER VAULT, A spirit voice whispers, "Windmill..." and we are blown back to the crypt.

We encounter the sage yet again while returning to our previous location -- this time, he mentions that the Dark Prince is alive and well, but flew away with hellish power of some kind, and that "NOW ZIN IS RULER AND HERE TO STAY."  Well, we dont really care who the big bad is, we just need to deal with him/her/it by means of solving various obscure puzzles, per the usual.

Sabrina mentions that "This is the wizards castle" as we re-enter the castle, and suggests that he is quite dangerous if angered.  Heading downstairs again, we find a treasure chamber, where we can pick up a scroll -- or try to, as everytime we attempt to GET SCROLL, a mysterious wind blows the scroll out of reach.  I tried to SAY WINDMILL here, which did summon a wind to blow us back to the crypt, but the transportation didnt bring the scroll along with it.

Returning and checking out the upper level of the castle, we find a high chamber leading to an eerie chamber.  Trying to enter it causes yet another magical wind to come up, blowing us back down the stairs.  We can examine the chandelier in the main chamber to note that its on a chain and cannot be reached from below or above; we cant tell if thats important or not.

In the eastern part of the forest lies a forlorn cemetery with a grating set into the ground -- and gravestones marked SABRINA, ERIK and INTRUDER, clearly meant for our party.  Spooky!  The grating isnt locked, but it is rusted shut and cant readily be broken open.  The sage shows up once again -- its not hard to get his advice, it seems -- to tell us that "THE EBONY WARRIOR IS A MIGHTY FOE" and suggest that a dipped (poisoned?) arrow tip can do him in.

We can actually pass through the dark, bat-populated cave to its northern side -- where a giant cobra rears its head.  If we hang around too long, it attacks, and were dead of poison within a few moves -- the first true death scenario weve encountered, and nicely handled in that it doesnt happen instantly but takes a little while for the poison to set in.

After a quick restore, were back to puzzle-solving.  Theres an abandoned house in the eastern part of the forest.  The busybody sage shows up to tell us that theres something shiny in the lake that can be retrieved by someone who can dive deep.

We can enter and explore the house -- theres a crate inside, and if we open it, a hideous zombie emerges!  This is an old-school zombie -- it has fangs and claws, and looks more like the grim reaper than a contemporary George Romero-style zombie.


We have no weapon, so well go upstairs for now.  The attic contains a candle, which we can take (finally, something portable!)  We can see the cemetery from the attic, though the window cant be opened.  Heading back downstairs, we find we cant TALK ZOMBIE.  It advances on us, and Sabrina advises us to "Flee!", so FLEE we shall.  We run into the sage again, this time informing us that "THE FIERY ONE WILL COME TO YOUR AID" and we need to "WAVE A SYMBOL OF YOUR BELOVED LAND."  Maybe the scepter mentioned earlier?

Wandering around looking for something else to do, we run into the sage again, who mentions that we need to summon him "WHEN THE RIGHT WAY HAS BEEN SHOWN, AND THAT STRANGE WORD IS KNOWN."  Okay.  Returning to the gryphon, I luck out with CLOUD as a guess for the second riddle, but still have no good ideas about the third.

Is there a way to get back up above the crypt?  We need to talk to the owl some more, it appears, and examine the lake shore again.  And yes, we can JUMP SOUTH at the stump to avoid the trap (or so it seems -- more on this in a bit.)  But the lake is too dangerous to explore, and too murky to see into.  The owl seems uninterested in us.  The candle we just picked up is not lit, so its probably only part of a puzzle. 

The zombie is apparently flammable, as if we try to BURN ZOMBIE with the unlit candlem, the game tells us were forgetting something, and the zombie is not afraid.  Hmmmm... theres a torch bolted to the wall near the entrance to the gryphons residence, and we can LIGHT CANDLE there.  Trying to BURN ZOMBIE now scares the dry, ragged zombie out of the house, and we can acquire a mouse (perhaps to give to the owl) and a magic sack.  The crate contains nothing but a note reading, "From Karel Thurg -- Handle with care!"

Can we see inside the cave with the lit candle?  Nope.  Well EXTINGUISH CANDLE for now, then, in case we need to conserve its light for later (we wont, but its good practice anyway.)  We can GIVE MOUSE to the owl, who flies away, saying, "If you ever need me, just whistle."  Okay.  We can WHISTLE any time, but the owl is apparently only going to help us with a specific puzzle; he flutters by without assisting otherwise, and is no use for scaring away the possessed cat.  We havent taken time to OPEN the magic SACK yet, and doing so, we find that it contains a gleaming black ring and a strange-looking flute.  Presumably the ring is the one the sage says we need; Im not sure about the flute, but maybe we can charm the cobra with it?  Yep!  We PLAY FLUTE and hes out of the way.  We have to disable the graphics (toggling them with the ENTER key) to read that the room were in has exits leading north, south, and west.  (This is not an easy game to map, as there are lots of detailed interior spaces that are larger than one "box" using traditional techniques.)

To the west is Fair Deal Sams, a shop operated by a demon, apparently, though there are no obvious goods for sale.  TALK SAM establishes that "I have just the thing for you. But its not free!"  So well have to return here later with something of value to trade.  Going north takes us to a high ledge, where we can see a castle in the distance with a deaths head carved into the mountainside; were too high up to get down from here, but I suspect the end of the game will take place in that castle.  (Actually, its a fortress, as Erik kindly explains when we try to EXAMINE CASTLE.)

Theres nothing obvious we can do at the moment -- can the owl reach the chandelier in the castle we visited earlier?  Nope, nor can he snag the windblown scroll in the treasure chamber below, nor can Erik or Sabrina pick it up.  We can WEAR the RING from the magic sack; theres no immediate reason to do so, but well heed the sages advice in case it makes something happen; it doesnt seem to.

Id almost forgotten that the sign in the crypt poses a riddle -- weve already discovered the answer to this one, though I didnt register it until I came back to consider this puzzle.  SAY WINDMILL always brings us to the crypt from elsewhere, but when were there already, it opens the elevator doors!  Well, the doors arent for an elevator, actually, as inside is a cairn of glowing stones with a sword embedded in it.  We cant PULL SWORD, though, as It wont budge.  We can read it, though, to see the name "KADASH" -- a reference to an earlier Apshai-esque Polarware title, The Sword of Kadash.

Hmmmm.  Im still stuck, and entirely ready to reference a walkthrough to learn that while we cant retrieve the sword, ERIK, GET SWORD works!  (Though ERIK, PULL SWORD still indicates that it wont budge.)  I really need to remember that our fellow party members can sometimes do things we cant manage ourselves.  And Im also resigned to cheating and learning that the answer to the gryphons third riddle is DREAM -- he disappears in frustration, leaving a jeweled scepter in his wake.  Trying to GET SCEPTER notes that inventory is getting heavy -- can we store things in the magic sack?  Yes -- we can (for example) PUT FLUTE IN SACK to free up a slot.

Now what?  Can SABRINA, SCARE CAT help us with the possessed animal?  Nope -- "Booga, Booga, Booga!" Nothing happens.  Erik has a sword, but refuses to slay any animal of the forest.  But ASK SABRINA ABOUT CAT helps -- she says, "I can handle this beast! Perhaps I should cast a spell."  And yes, SABRINA, CAST SPELL works. 

To the west, we now encounter a stereotypical broom-bearing witch near a simmering kettle and a stone tablet.  She wont let us GET TABLET, and while were messing with that, Erik drinks some of the potion in the witchs kettle on his own initiative.  EXAMINE ERIK yields only, "Oh, no!"  ASK ERIK ABOUT ERIK produces, "Im not afraid of an old witch!"  But Erik is not feeling well at all; hes not able to kill the witch, either.  And now... hes turned into a frog?  But he returns to normal after a few moves.  Hmmmm.

Im guessing Eriks frog form is useful for swimming at the murky lake, but find that we cant JUMP SOUTH by the stump at the moment, as we fall into the trap again?  It seems thats what pushing the button in the crypt does; theres no elevator, but it allows us to avoid falling through the trap door.  Jumping actually has nothing to do with it, were just navigating north and south in the normal manner once the door is held shut.  We can command ERIK, DRINK POTION to get his transformation started intentionally, then drop him at the lake after he turns -- Erik the frog dives in and emerges with a silver coin, and the timing works out so that he changes back shortly afterward.

Will the coin let us buy something from Fair Deal Sam?  Yes, he gives us a glowing sphere of annihilation.  On the way there, we spot a large, purple diamond in the bat cave; it wasnt there before, and it bears images of a centaur, a black knight, a dragon, a troll, and a demon.  Interesting; the black knight is likely the ebony warrior the sage mentioned, so this might be a preview of our foes to come.

How do we stand regarding our apparent objectives?  Were missing a shield for the final confrontation, per the sages earlier advice.  We havent been past the grating in the cemetery... ERIK, HIT GRATING doesnt work, nor does ERIK, PRY GRATING -- though the attempt notes that Fingers cannot fit into the cracks.  The scepter wont fit, but ERIK, PRY GRATING WITH SWORD works (with a bit of comical pratfall action as a bonus -- it seems Erik is heir to the sword, but not necessarily skilled with it.)

As we enter the grating, it slams shut above us and we are trapped.  There is a censer here, made of brass and gold, with the engraved words: "Wave me."  We cant get out of here by traditional means, but SAY WINDMILL blows us back to the crypt as usual, and now we can continue.

Theres still no shield in sight -- I wonder where were supposed to wave the censer?  We can LIGHT CENSER from the torch near the gryphons den, and waving it around seems to produce an overpowering cloud of incense wherever we happen to be, but no specific effect.  Aha!  In the treasure chamber below Zins castle, A blood-curdling howl erupts from the walls of the chamber, and now we can GET SCROLL... except, no, now it rolls away instead of blowing away.  SABRINA, GET SCROLL works -- it must be partial to magic users -- and we can also ask her to read the scroll, revealing that Its a spell of laughter.  Okay.

Im not sure whats changed, but now we can go the top of the stairs in Zins castle and meet the wizard himself; Mr. Antiochia has indulged in a bit of a pun here, as hes the wizard Zin, and the wizard is in.  Since hes not apparently a threat, we can TALK ZIN -- we learn that the tablet the witch has belongs to him, and if we recover it hell show us how to reach the fortress.

I didnt know what would happen when I asked Sabrina to cast a spell on the witch, but she uses the scroll of laughter and while the witch is recovering, we can GET TABLET and escape (I had to do some inventory juggling here, so fortunately she doesnt recover quickly; I extinguished the censer before putting it in the sack, just in case.) Returning the tablet to the wizard yields the word, "Lorelei".

We SAY LORELEI at the high ledge facing the fortress (since there doesnt seem to be any other way to approach it) and a bridge materializes -- along with The Vampire!  He kidnaps Erik and throws the rest of the party into a pit.  And now we need to pick up with side 2 of the disk... having been stripped of our inventory, though a few key variables seem to persist from side 1 so its not a completely separate piece of code.

Sabrina is out cold, and WAKE SABRINA doesnt work; we cant KISS SABRINA, despite that working in some other stories.  Theres not much here, aside from a four-inch wide pipe near the top of the pit, trickling water down.  We have nothing to carry water in, but we can SPLASH SABRINA to revive her.

SAY WINDMILL has lost its power here in Karel Thurg.  ASK SABRINA isnt very helpful, though we certainly agree that "We must find a way out!"  LOOK DOWN reveals a drain hole in the floor, and closer examination suggests it opens up into a wider pipe, but we cant enter it or find anything inside it.  The pit is deeper than our combined heights; Sabrina has no useful spells for this situation, and doesnt think UNDRESSing is such a good idea (honestly, I thought we could make a rope from our clothing, princess!)  I tried to BLOCK HOLE and COVER HOLE to raise the water level and let us swim out of the pit, but that didnt work either.  What about the owl?  We might be on to something -- our mouth is swollen and bruised, so we cant manage to whistle, but Sabrina can.

Instantly the owl appears and drops a branch with a beehive -- "My debt is repaid, fair one," he says, so thats as much help as we can expect.  I hope neither of us is allergic to bee stings... but, no problem, the hive is empty.  We can PUT HIVE IN HOLE, which blocks the drain, and water does indeed start to fill the pit.  We have to HOLD BRANCH as the water rises, and then were out of the pit.

Oddly enough, Prince Erik is just lying here, unconscious, but we can WAKE ERIK to get him back on his feet and restore the party to full strength.  Why The Vampire just left him here is unclear at this point, and neither Erik nor Sabrina is up for conversation; both seem frightened by an unseen presence.

Heading north, we enter a maze of dungeon caverns, though again its not really a maze and is readily mappable.  To the east is a seaside spot, where an injured seagull is flying by (one of the only bits of animation in the game -- the sequentially-drawn rendering technique allows this to work, by sketching and erasing the gull in a series of positions.)  We cant HELP SEAGULL, as he wont let any of us near.

Eriks sword lies in a cavern chamber to the west, but cant be lifted by the player.  Then a troll appears, and we are inspired to discover that ERIK, GET SWORD works.  ERIK, KILL TROLL doesnt quite work as expected, but young Eriks bumbling attack sends the troll fleeing in terror anyway.  He doesnt stay gone long, though; he keeps coming back, but stays away long enough for us to escape each time.

The scepter lies to the north, and can be easily reclaimed; the ring lies to the east of the scepter.  Further east is a corridor, flanked by rooms containing an armed centaur, a fire-breathing dragon, and a black knight, so wed better be prepared before we come here.  Fortunately, we can escape all of these encounters readily, and arent trapped in any location.

An interesting room to the north contains a basin of clear water and two statuettes of Aredor and Caphis -- famous warriors who were known for their good deeds and compassion.  Sounds like we need to help the seagull out somehow, but I have no good ideas about that yet.

Exploring some more, we find a waterfall in the western part of the cavern.  Its always worth trying to GO WATERFALL in these games, and we find ourselves in the trolls den, along with the troll himself.  Erik again fails to dispatch the troll, but the troll seems terrified of the Kadash sword itself, fleeing his own abode.

A garden area south of the waterfall contains an enchanted stream, but is otherwise a dead end.  Heading northward, we reclaim the sphere of annihilation; nearby, to the southeast, is a cavern with a rusty lever protruding from the wall.  We can PULL and PUSH the LEVER to block the only exit.  Can we lure the troll in here somehow?  Ah, we can just WAIT and he shows up; when Erik attacks, he runs blindly into the gate after weve closed it, knocking himself out.  Searching him doesnt yield anything interesting, but he doesnt get up again, so this must just be a way to set those nuisance encounters aside.

Can we make any headway on the more formidable monsters?  Eriks swordsmanship is no good against any of them; trying to THROW SPHERE (of annihilation) at the dragon yields countering advice from Sabrina, but it works on the centaur, and we can grab his bow and arrow (we have to get each piece separately.)

We cant just SHOOT DRAGON -- we have to LOAD BOW first, and even then the arrow bounces off of his thick scales. It does successfully penetrate the black knights armor, but seems to have no real impact on him otherwise.  The sage said something about poisoning the arrow, didnt he?  The flowers by the stream south of the waterfall look weird, according to Sabrina, and we can DIP ARROW IN WATER here.  But nothing comes of it -- the knight still raises his axe with no apparent damage done.  Dipping the arrow in the basin by the statuettes is more interesting -- the sharp tip begins glowing softly, and now the knight falls, his evil destroyed in a blinding white light when the arrow penetrates his armor and giving us access to a pair of steel doors, shut tight for now.

We still have to deal with the dragon -- somehow.  Erik and Sabrina seem to be no help.  Returning to the seagulls area, we can EXAMINE BEACH to note that Its perfect sand for building sand castles, except sharp objects protrude here and there.  We can DIG SAND to yield a murex shell, and LISTEN SHELL to learn that this is what the sage tried to give us during the crystal ball vision near the beginning of the adventure.  The shell now transforms into a bright shield bearing a beautiful coat of arms!  We still cant seem to help the poor seagull, though.

What happened to the scepter?  I seem to have misplaced it somewhere... I must have dropped it while we were dealing with the troll in his den, when Erik hit me with his sword.  We havent used it for anything -- WAVE SCEPTER at the doors the black knight was guarding doesnt do anything, but it does have an interesting effect on the dragon.  He says he was once a human, and that he will join our quest; we can summon him by his name, Fury, in time of need.  Then he burrows deeply into the depths of Karel Thurg -- I never knew dragons were a burrowing species!

How do we open the iron doors, now?  SUMMON FURY seems like an option, and yes, it calls the dragon, who tears the doors open and then disappears into the throne room to hold The Vampire at bay.


The Vampire summons lightning to destroy our party, but the shield reflects it, catching the evil being off guard.  Fury takes advantage of the opening to hit him with a stream of flame, and the vampire drops a crown.  Prince Erik was previously referred to as the heir, so it seems like we should suggest ERIK, GET CROWN.  He does so.

But were not out of the woods yet -- power-hungry vampires dont respect ceremony or rules of succession, it seems.  Our feet are stuck to the ground and cant be moved.  ERIK, WEAR CROWN is the next logical step, but almost fails, as the Vampires spell fights Eriks actions -- but after donning it, he now seems free of the vampires influence.  Were still stuck in place, apparently held by the vampires stare.  CLOSE EYES doesnt help;  ERIK, COME HERE isnt even acknowledged by the parser, but GET ERIK frees us from the spell also.

With our feet unstuck, we can FLEE and go back into the caverns -- but where should we go?  Ah -- a few turns later, the cave starts shaking.  Erik warns us that it is about to collapse, and we should seek an open area.  Once more down to the beach!

Once were here... um... now what?  We cant SUMMON SAGE, and Erik and Sabrina are uninformative.  We do have time to notice that the crown on Eriks head is in fact the titular Crimson Crown, so it seems were just about done here.  But what remains to be done?  We hear the dragons roar fading out in a strangled tone, so Fury has probably sacrificed himself for our cause.  Is there really nothing to do but WAIT?

Ahhh... given some time, we hear the vampires strangled shout as well.  And then a ship appears and approaches the shore, taking us all onboard.  In short order, the fortress collapses, and Erik realizes he must take on the rule of his fathers land.  He re-christens his sword Fury, in the late dragons honor, and plans to hang it on the castle wall, despite a cautionary note from Sabrina that everyone needs to be kept safe from it.  And with a possible sequel set up, now its THE END!


I really enjoyed The Crimson Crown -- theres a lot going on in this story, and the puzzles are logical with a nice sense of progression and pacing in the final act.  I did use the walkthrough several times, but nothing seemed like I couldnt have figured it out if Id just had a little more patience -- there are quite a few good but subtle hints provided in-game, and many unsuccessful attempts provide clues as to the right course of action.  The Polarware adventures were well-regarded in their day, and Im sorry its taken me so long to come back to the publishers output.  Ill try to catch up a bit soon.
Read more »

Baixar THE KING OF FIGHTERS A 2012 Para Android


THE KING OF FIGHTERS-A 2012 v1.0.1 APK + OBB


O jogo 2D lutando contra "KOF-Android" retorna em Android com toneladas de novos conteúdos, como nunca antes!


The King of Fighters-A 2012 play.google.com.kof2012a

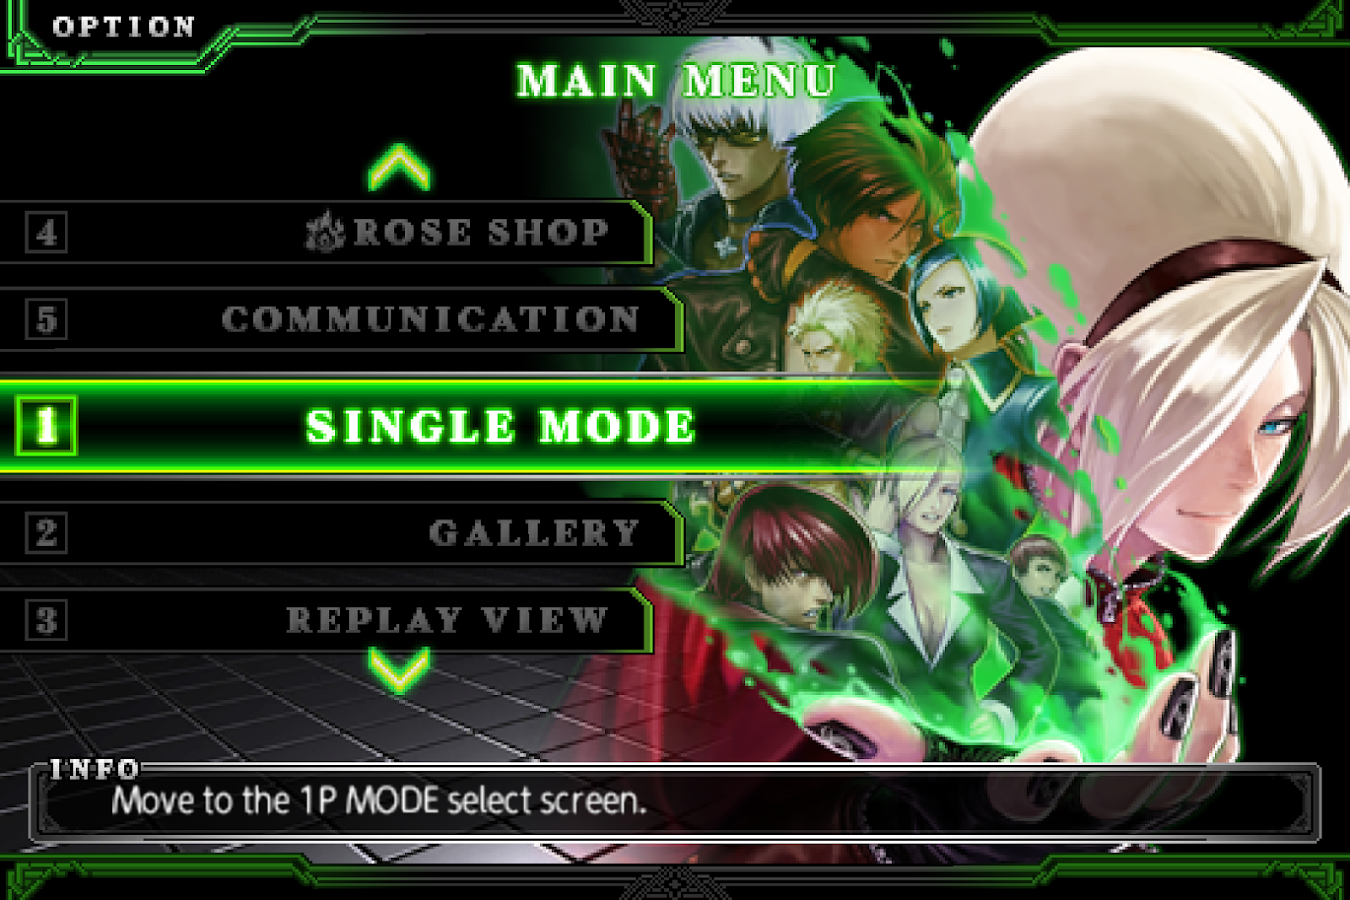
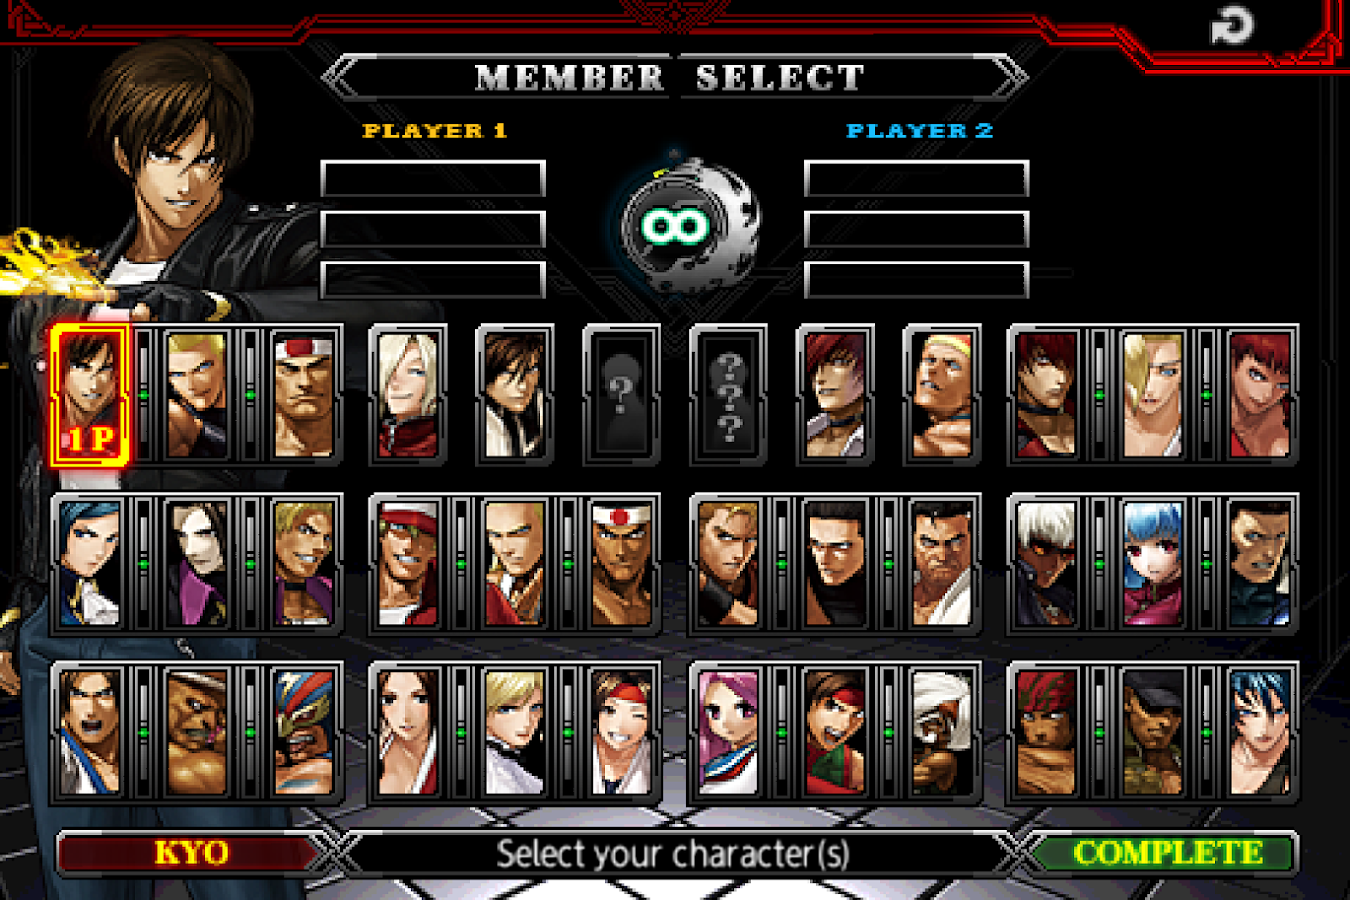
34 personagens jogáveis! 6 diferentes modos de jogo disponíveis em ÚNICO MODO para desfrutar do jogo por horas e horas mesmo sozinho! Comandos simples permitem executar facilmente qualquer tipo de combo! 

O jogo 2D lutando contra "KOF-Android" retorna em Android com toneladas de novos conteúdos, como nunca antes! 

PERSONAGENS NOVOS, novas equipes
Além dos personagens que edição anterior, o 4 novo "Art of Fighting", "Psycho Soldier", "KIM", e as equipes "Ikari", "ninhos-Style KYO" e "IORI com o Power of Flames" (14 novos personagens), se juntar ao elenco de "KOF -Android "! Agora você pode criar o seu time favorito nesta lista formidável de 34 lutadores! 

um modo single-player rico em conteúdo 
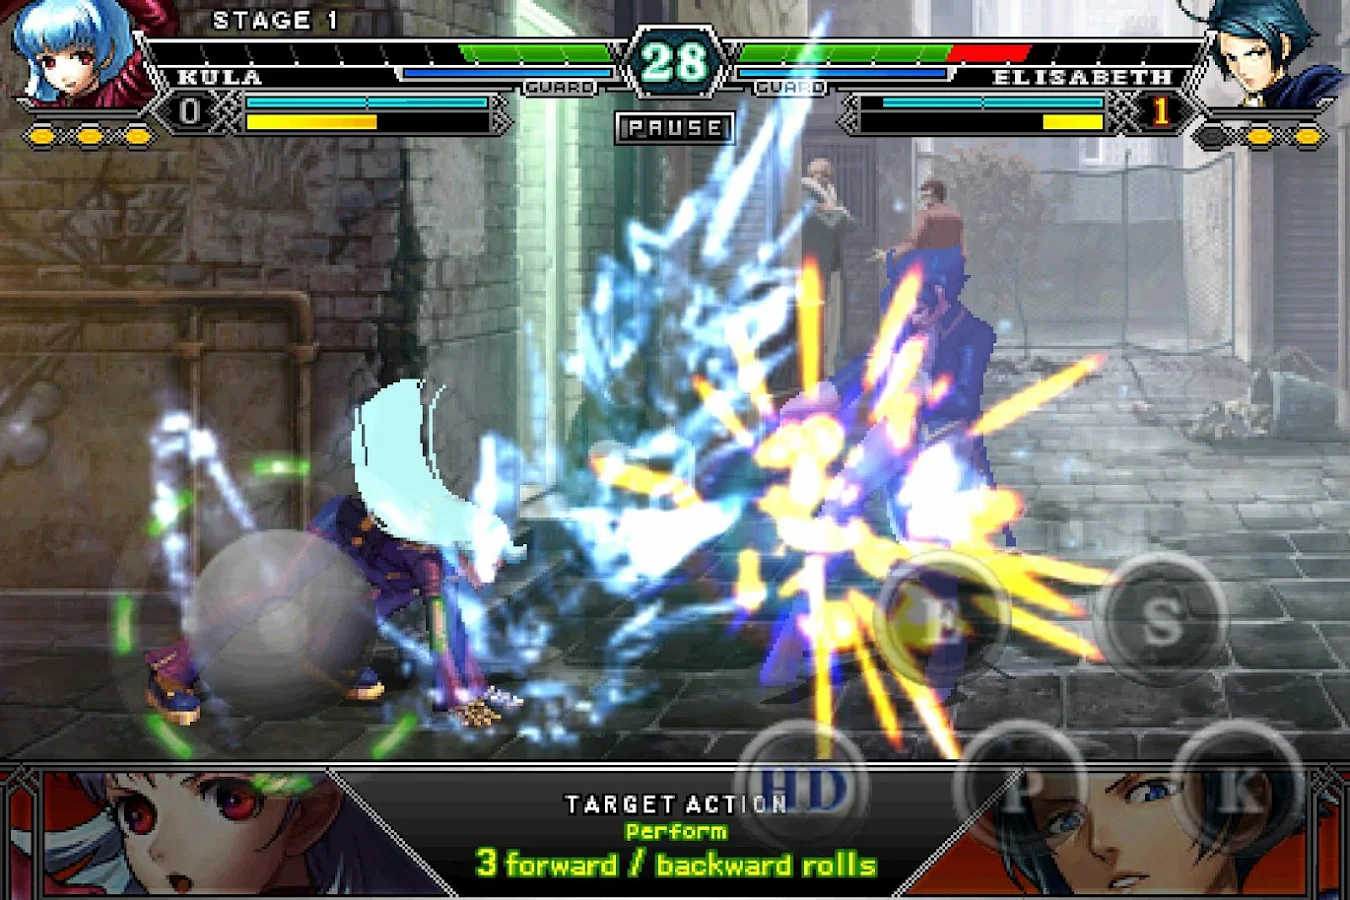
6 modos de jogo estão disponíveis para milhares de horas de diversão, mesmo quando se joga sozinho: "única batalha" para uma -on-1 lutas, "team battle" para o clássico KOF 3-on-3 gameplay, Mode "sem fim" para derrotar o maior número de adversários possível com um personagem, o modo "desafio" para limpar ensaios por cumprimento das condições, o recém-lançado " Time Attack "Modo de competir pelos melhores tempos claros vencendo 10 partidas, e" modo de treinamento "para se acostumar com os controles virtuais baseados em Pad e praticar seus combos. 

comandos simples 
The Pad virtual recria perfeitamente reproduz controles suaves do KOF. Mesmo novato jogadores em jogos de luta será capaz de liberar vários movimentos especiais, movimentos super especial, NEOMAX super movimentos especiais, e outros movimentos complexos em um toque. com os comandos simples, você pode facilmente executar muitos dos combos de fantasia do jogo! Consulte "TUTORIAL" Mode para uma explicação sobre estes comandos. 

ADIÇÃO DE TONELADAS DE NEGOCIAÇÃO novos cartões, ilustrações, E OUTROS CONTEÚDO EXTRA 
abundância de novos Trading Cards (que pode ser adquirido usando os pontos ganhos durante o jogo), juntamente com novas ilustrações (que pode ser visualizados a qualquer momento, o cumprimento de determinadas condições) foram adicionadas a esta versão mais recente! Além disso, "KOF-Android 2012" inclui esboços e ilustrações que só pode ser visto aqui, que os fãs não podem perder! 

dispositivos recomendados

  • Samsung Galaxy S3 
  • Samsung Galaxy S2 
  • Nexus 7 
  • Xperia acro S 
  • HTC J um 
  • XPERIA so-03D
Você pode baixar este jogo em outros dispositivos, no entanto erros e / ou dificuldades de executar o aplicativo pode ocorrer 


Obrigatório Android O / S:  4.0.3 +

Imagens:

THE KING OF FIGHTERS-A 2012 - Screenshot

Download  :  17Mb APK

TUTORIAL PASSO A PASSO PARA INSTALAR


**Todos os links para download serão redirecionados para a pagina de propaganda Adf.ly , depois de ser redirecionado aguarde o fim da contagem de 5 segundos e clique em FECHAR PROPAGANDA no canto superior direito, não clique em mais nada que aparecer no site somente no local indicado**.

*Tutorial 1# (OBB baixado pelo PC 
1º Passo;
 Baixe o APK do jogo;
  • Opção 1  Zippyshare
  • Opção 2  Mega
2º Passo; 
Baixe a OBB do jogo em 6 partes;
  • Parte 1 Zippyshare (200mb)
  • Parte 2 Zippyshare (200mb)
  • Parte 3 Zippyshare (200mb)
  • Parte 4 Zippyshare (200mb)
  • Parte 5 Zippyshare (200mb)
  • Parte 6 Zippyshare (144mb)
3º Passo;
selecione ao mesmo tempo as 6 partes baixadas , clique com o botão direito do mouse e escolha a opção: "extrair para kof2012a - OBB AndroidPasso-a-Passo". dentro existe a pasta "com.snkplaymore.kof2012a"

4º Passo;
Instale o APK em seu smartphone / tablet. No final da instalação você terá duas opções: CONCLUIR / ABRIR , clique em CONCLUIR

5º Passo;
Mova a pasta "com.snkplaymore.kof2012a" para Memoria Interna / Android /obb

6º Passo;
Reinicie seu aparelho, ligue seu WI-Fi /3G, quando iniciar o jogo  automaticamente baixara dados adicionais.


dispositivos recomendados
  • Samsung Galaxy S4
  • Samsung Galaxy S3 
  • Samsung Galaxy S2 
  • Nexus 7 
  • Xperia acro S 
  • HTC J um 
  • XPERIA so-03D

Você pode baixar este jogo em outros dispositivos, no entanto erros e / ou dificuldades de executar o aplicativo pode ocorrer 


PEDIDO: Se você costuma usar os downloads do site Android Passo a Passo e deseja ajudar para o site continuar, CLIQUE nas propagandas exibidas aqui no site, elas são uma importante fonte de renda para o site Android Passo a Passo, basta clicar e depois fechar a janela, não custa nada dar essa força valeu!!


Baixe também o app do Android Passo a Passo e tenha um acesso mais rápido ao blog Clique AQUI

Read more »